


Table of Contents
- What Comes In the Box?
- How to Assemble a Shoe Rack?
- Anti-tip Safety (Highly Recommended)
- Troubleshooting & Pro Tips
- Why Customers Love This Wood Shoe Cabinet?
- How Many Pairs of Shoes Fit?
- Can I Assemble It Alone?
- Do I Need Power Tools?
- Are There Any Promotions If I Buy a Shoe Rack Now?
- Care & Usage
Thanks for choosing Tribesigns. To make setup even easier, this guide walks you through the process step by step using model HOGA-J0232/J0273/J0345 as a real-world example. The part numbers (1–11) and hardware letters (A–M) referenced below come from that unit, but the build method is nearly the same across most Tribesigns shoe racks. Our goal is simple: help you assemble your cabinet quickly, safely, and perfectly level the first time—no guesswork required.
What Comes In the Box?

Board Parts (Labeled on The Edges)
|
Part No. |
Name |
Qty / Notes |
|
1 |
Top panel |
1 |
|
2 |
Center panel |
1 |
|
3 |
Fixed shelves |
2 |
|
4 |
Left side |
1 |
|
5 |
Right side |
1 |
|
6 |
Bottom divider |
1 |
|
7 |
Bottom panel |
1 |
|
8 |
Legs |
4 |
|
9 |
Left door |
1 |
|
10 |
Right door |
1 |
|
11 |
Adjustable shelves |
4 |
Hardware (Lettered Bags)
|
Letter |
Item |
Qty / Notes |
|
A |
Cam locks |
16 |
|
B |
Cam bolts |
16 |
|
C |
Wooden dowels |
12 |
|
D |
Self-tapping screws |
50 |
|
E |
Hex key |
1 |
|
F |
Machine screws |
4 |
|
G |
Metal rails |
2 |
|
H |
Hole covers |
8 |
|
I |
Mounting disc |
1 |
|
J |
Concealed hinges |
4 |
|
K |
Small door pads / brackets |
8 |
|
L |
Foot caps |
2 |
|
M |
Shelf pegs |
16 |
Tip: Lay parts on a carpet or blanket so you don’t scratch the finish. Hold off on fully tightening until the frame is squared up.

Tools you’ll need at home
- Phillips screwdriver (#2)
- Rubber mallet (helpful for snug dowels)
- Drill + 1/4" bit only for the anti-tip kit (or use a stud finder and wood screw as noted below)
- Tape measure & level
- We recommend hand tools; if you use a driver, keep torque low.
How to Assemble a Shoe Rack?
1) Prep the shelves (Parts 4 & 5)
Install cam bolts B and dowels C into the pre-marked holes of shelves 4 and 5 as shown in the manual’s first diagram for Step 1.

2) Build the side frames
Join the side panels (4 & 5) to the bottom divider (6) using dowels C and lock with cam locks A. Match “narrow/wide” hole groups as shown to keep orientation correct.

3) Add the fixed shelves and center panel
Insert the two fixed shelves (3) and the center panel (2). Use the cam-and-dowel method: bolts B into the shelves, align to the cams A, then turn to lock. Make sure the finished edges face forward.

4) Install the bottom panel and legs
Attach the bottom panel (7) to the case, then secure the four legs (8). The manual shows driving cam bolts B into the panel and then locking from the case side; set all four legs before tightening.

5) Attach the top panel
Set the top panel (1) on the case and lock with cam locks A from below. Double-check the box is square before fully tightening the cams.

6) Add shelf pins and cover caps
Push shelf pegs M into the holes at your preferred heights; press on hole covers H where shown. Slide the adjustable shelves (11) onto the pegs.

7) Hang the doors
Mount hinges J to doors 9 and 10 (hinges usually come pre-attached to the door side). Fasten the hinge plates to the cabinet using self-tapping screws D. Then make fine adjustments—up/down, in/out, left/right—using the hinge screws until gaps are even. The manual’s hinge diagram shows which screw moves which direction.
8) Install the small door pads/brackets
Fit K at the inner front edges as shown and secure with screws D. These help the doors close softly and stay aligned.

9) Final shelf placement
Set the remaining adjustable shelves (11) on pegs M. Space them based on your shoes—short heels and sneakers up top, boots on the bottom row.

Anti-tip Safety (Highly Recommended)
Tribesigns includes an anti-tip kit. Here’s the quick take:
- Find a stud where you want the cabinet. For concrete walls, ensure there are no steel bars inside before drilling.
- Wall side: Drill, insert the expansion anchor e, and screw on the wall bracket a with screw c.
- Cabinet side: Attach the second bracket a to the back edge of the top panel using screw d.
- Connect cable: Thread the steel cable b through both brackets and twist the connector to tighten.
Troubleshooting & Pro Tips
Cams won’t lock? Make sure the arrow on each cam faces the cam bolt hole before you turn it. Seat the joint fully—no gap—then tighten by hand.
Doors look uneven? Use the hinge micro-adjustments to nudge the door position (height, depth, and side-to-side) until the reveal is even all around.
Wobbly on carpet? Level the legs and push the cabinet back to the wall; then secure the anti-tip kit.
Missing part? Keep your packaging, take photos, and reach out—our support team will make it right.
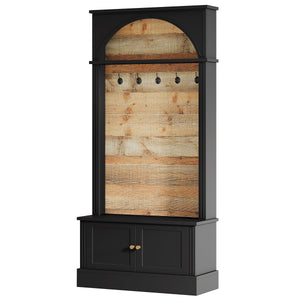
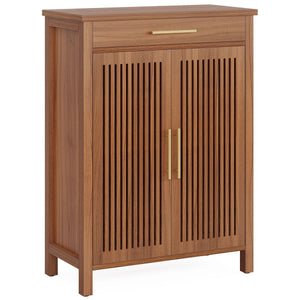
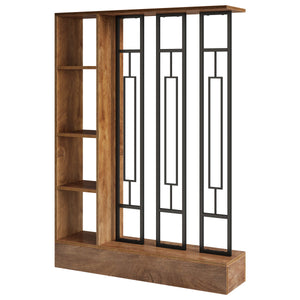
Why Customers Love This Wood Shoe Cabinet?
Room for real-life wardrobes
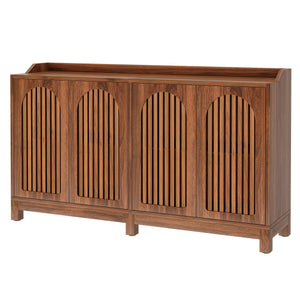
Our 24-pair wood shoe racks with 4 adjustable tiers fit everything from flats and sneakers to short boots.

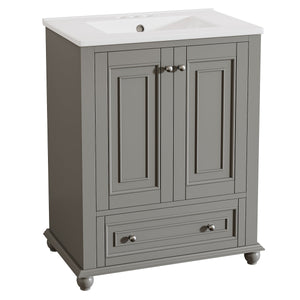
Slim Size
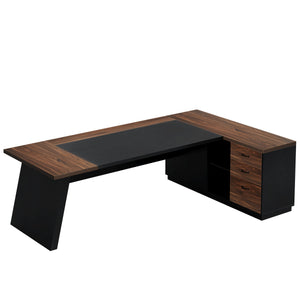
At 29.6"W × 13.7"D × 43.3"H, it comfortably holds up to 24 pairs while keeping clutter out of sight—more practical than an open shoe rack.
The slim profile tucks neatly into hallways and small foyers. Use the top surface for keys or bags, while the open space underneath keeps your daily pairs within easy reach.
Elevated, wipe-clean design
The vintage walnut finish with gold handles looks polished in any décor, and the four metal legs lift the cabinet for quick vacuuming or mopping underneath.
Durable build you can count on
Crafted from E0-grade engineered wood, this shoe storage cabinet is sturdy, easy to clean, and designed for everyday use—supporting up to 300 lbs overall.
Style that blends anywhere
A modern, enclosed shoe cabinet silhouette keeps your entry looking tidy and intentional—great for entryways, hallways, living rooms, or even as an extra organizer in a bedroom.
Plus, you’re covered with our 18-month warranty and friendly customer service whenever you need a hand.
Looking for more shoe storage ideas? Explore our other Tribesigns shoe cabinets and wood shoe racks to match your space and style.
How Many Pairs of Shoes Fit?
Capacity varies by shoe size and shelf spacing. With four adjustable shelves, most households fit everyday pairs inside and keep taller boots on the bottom.
Can I Assemble It Alone?
Yes, but a second person makes door alignment faster.
Do I Need Power Tools?
Hand tools are enough. Use a drill only for the anti-tip kit or if you’re mounting into a stud.
Prefer visuals? View the illustrated PDF or message our product specialists for on-the-spot guidance.
Are There Any Promotions If I Buy a Shoe Rack Now?
Yes—our Early Black Friday deals run 11/4–11/13:
- 15% off orders over $149 with code Early15
- 18% off orders over $199 with code Early18
- 20% off orders over $299 with code Early20
Just add your Tribesigns shoe cabinet to the cart and enter the code at checkout.
Care & Usage
Wipe with a soft, slightly damp cloth; avoid harsh chemicals. For long boots, remove one adjustable shelf to create a taller bay.