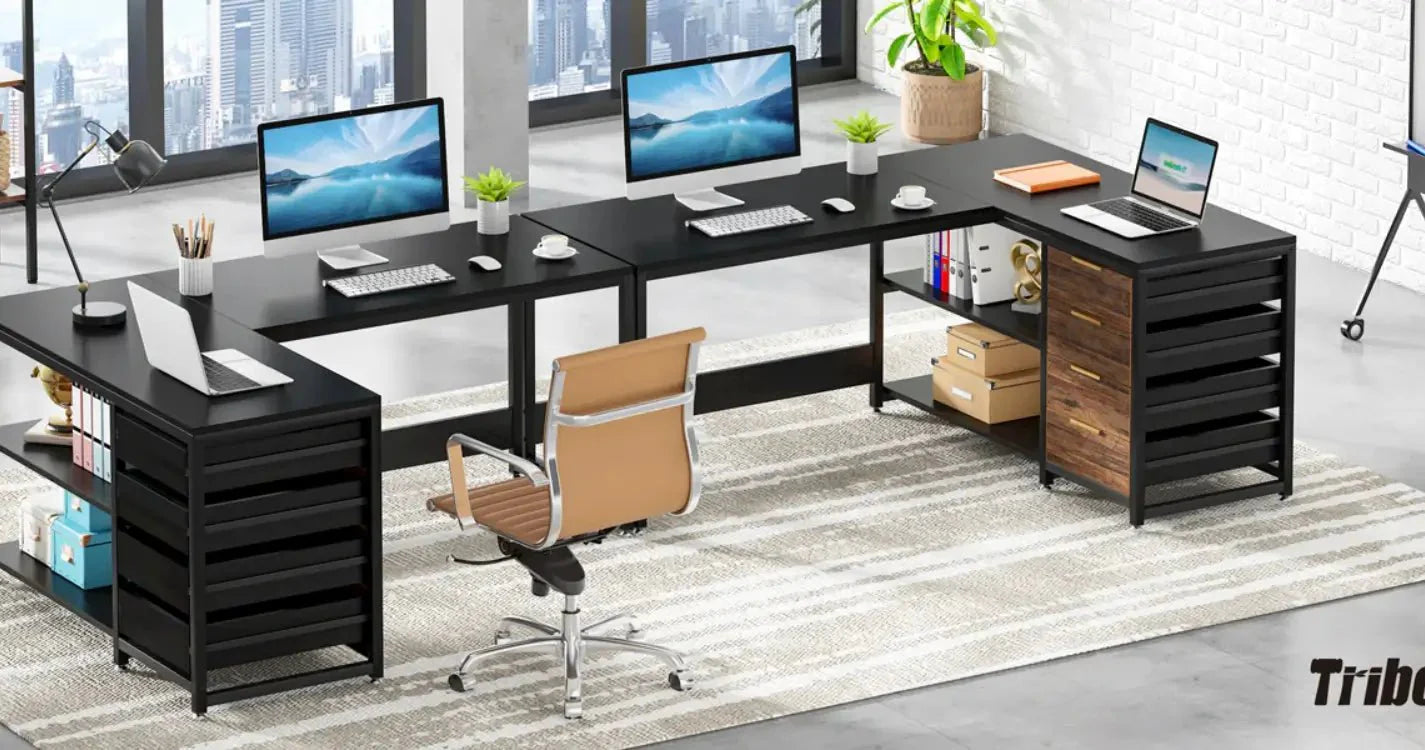

This guide walks you through the assembly process for the Tribesigns 59" reversible l-shaped desk with drawers(HOGA-XK00397),and shelves. Before starting, we strongly recommend reading through the instruction manual once and confirming that all parts and hardware are included.
While most steps can be completed by one person, having a second person nearby—especially when positioning larger panels—can make the process faster and safer.
Please note that the desk can be assembled in two configurations, with the side cabinet installed on either the left or the right. Choose your preferred layout before you begin, as this will affect the orientation of several steps.

Parts Checklist
Before assembly, lay out all components and compare them with the parts list below. This step helps ensure a smooth installation and avoids interruptions once assembly begins.

Wooden Panels & Structural Parts
- Part 1 (1 pc): Main desktop panel
- Part 2 (1 pc): Secondary desktop panel
- Part 3 (2 pcs): Side panels
- Part 4 (1 pc): Back support panel
- Part 5 (4 pcs): Drawer front panels
- Part 6 (4 pcs): Drawer side panels
- Part 7 (4 pcs): Drawer side panels
- Part 8 (4 pcs): Drawer back panels
- Part 9 (4 pcs): Drawer bottom panels
Metal Frame & Support Components
- Part 10 (1 pc): Desk frame panel
- Part 11 (1 pc): Cabinet side fram
- Part 12 (1 pc): Cabinet center frame
- Part 13 (1 pc): Cabinet side frame
- Part 14 (2 pcs): Lower support bars
- Part 15 (1 pc): Upper support bar
- Part 16 (1 pc): Upper reinforcement bar
- Part 17 (2 pcs): Horizontal connecting bars
Hardware Checklist
All required hardware is included. Sort the hardware by label before starting assembly to make each step easier to follow.
- A (32 + 1): Cam bolts – Ø6 × 35 mm
- B (32 + 1): Cam locks – Ø15 × 10 mm
- C (12 + 1): Screws – M6 × 30 mm
- D (10 + 1): Screws – M6 × 35 mm
- E (12 + 1): Screws – M6 × 45 mm
- F (2 + 1): Screws – M6 × 45 mm
- G (4 + 1): Screws – Ø7 × 57 mm
- H (1 pc): Allen key – M4 × 55 mm
- I (8 + 1): Small screws – 3.5 × 14 mm
- J (4 pcs): Metal reinforcement brackets – 80 × 32 × 17 mm
- K (8 pcs): Adjustable leveling feet – M6 × Ø32 mm
-
L (32 pcs): Anti-slip pads – Ø20 mm
Once all parts and hardware have been identified, you’re ready to begin assembly.
Step 1: Assembling the Drawers (Repeat for All 4 Drawers)
Before attaching any panels to the desk frame, the first step is to assemble the four drawers that make up the storage cabinet. I recommend laying out all parts on the floor or a large table to keep everything organized and easy to reach.
Step 1.1: Prepare the Drawer Components
Each drawer is assembled from the following parts:
- 1 drawer front panel
- 2 side panels
- 1 back panel
- 1 bottom panel
For hardware, each drawer uses:
- Cam bolts (A)
- Cam locks (B)
- Small screws (I)
- One metal reinforcement bracket (J)
Once you’ve grouped one full set of parts, you can repeat the same process for the remaining drawers later.
Step 1.2: Install the Cam Bolts
Start by threading the cam bolts (A) into the pre-drilled holes on the drawer front panel and the two side panels.
Make sure each bolt is fully seated but avoid overtightening, as this can damage the board or make alignment harder in the next step.
This pre-installation step helps the drawer pieces connect cleanly and securely when assembled.
Step 1.3: Connect the Side Panels to the Back Panel
Next, position the back panel upright and attach the two side panels to it.
Slide the side panels into place so the cam bolts align with the circular cam lock holes.
Insert the cam locks (B) into the larger holes and rotate them in the indicated direction until they lock onto the cam bolts.
Once secured, the drawer frame will already feel solid and well-aligned.
Step 1.4: Insert and Secure the Drawer Bottom
With the three-sided frame assembled, slide the bottom panel into the grooves at the base of the drawer.
Make sure the panel sits flat and fully supported along all edges.
Use the small screws (I) to secure the bottom panel in place. This step is important, as it prevents the drawer base from shifting or sagging over time.
Step 1.5: Attach the Drawer Front Panel and Reinforce
Align the drawer front panel with the open side of the drawer box and push it gently into position.
Lock it in place using the remaining cam locks (B), ensuring all connections are fully tightened.
Finally, attach the metal reinforcement bracket (J) at the designated spot to strengthen the drawer structure. This added support makes a noticeable difference in long-term durability, especially for everyday use.
Step 1.6: Repeat for All Drawers
Repeat the same process to assemble the remaining three drawers.
Before moving on, it’s a good idea to check that:
- Each drawer is square and evenly aligned
- All cam locks are fully tightened
- The bottom panels are firmly secured
Once completed, you’ll have four sturdy, well-built drawers ready to be installed into the desk frame in the next steps.

Step 2: Assembling the Drawer Cabinet Frames
With all four drawers assembled, the next step is to build the metal frame structure that will hold them. This step focuses on preparing the drawer cabinet frames and installing the adjustable feet that help level the desk later on.
Step 2.1: Identify the Frame Panels
In this step, you’ll be working with four metal frame panels:
- Frame panel 10
- Frame panel 11
- Frame panel 12
- Frame panel 13
Each panel represents a different section of the drawer cabinet structure. Before assembling, lay them out on the floor so you can clearly see their shapes and orientation.
Step 2.2: Install the Adjustable Feet
Take the adjustable leveling feet (hardware K, M6 × Ø32 mm) and screw them into the threaded holes located at the corners of each frame panel.
- Make sure each foot is threaded straight into the hole.
- Tighten them securely by hand at first.
- Final height adjustments can be made later once the desk is fully assembled and standing upright.
This feature is especially useful if your floor isn’t perfectly level, which is a small detail that makes a big difference in real-world use.
Step 2.3: Attach the Feet to All Frame Panels
Repeat the same process for all four frame panels:
- Panel 10
- Panel 11
- Panel 12
- Panel 13
Each frame panel should have its own set of adjustable feet installed before moving on. Once completed, the panels will be ready to support the drawer units and shelving structure in the next steps.
Step 2.4: Double-Check Alignment Before Proceeding
Before continuing, take a moment to confirm that:
- All adjustable feet are firmly installed
- The feet are threaded evenly and not cross-threaded
- Each frame panel sits flat when placed on the floor
Doing this now will save time later when the desk is fully assembled and needs final leveling.

Step 3: Assembling the Drawer Cabinet Structure
With the drawer frames prepared, this step focuses on building the main drawer cabinet structure. This is where the cabinet starts to take shape, so taking your time here will make the rest of the installation much smoother.
There are two layout options (Style 1 and Style 2) shown in the instructions. Both styles achieve the same final structure—choose the one that feels more intuitive based on your workspace and orientation.
Step 3.1: Position the Side Frames
Begin by standing the two side frame panels upright:
- Panel 11
- Panel 13
Make sure both frames are facing the correct direction and placed parallel to each other. The pre-drilled holes should be aligned inward, as these will be used to connect the shelves and support rails.
Step 3.2: Install the Horizontal Support Rails
Next, attach the long horizontal rails (15 and 16) between the two side frames.
- Use the E (M6 × 45 mm) screws to secure the rails at the top and bottom positions.
- Ensure the rails are level before fully tightening the screws.
At this stage, the structure will still feel slightly loose, which is normal. Full stability comes after all panels are connected.
Step 3.3: Mount the Center Storage Frame
Position panel 12 (the center storage frame with multiple horizontal bars) between the two side frames.
- Align its mounting holes with the horizontal rails.
- Secure it using E screws as shown in the diagram.
This center frame is what separates the drawer section from the open shelving area, so proper alignment here is important for both drawer movement and overall balance.
Step 3.4: Attach the Lower Support Bars
Install the lower support bars (14) at the base of the cabinet structure.
- These bars connect the side frames and help reinforce the bottom of the cabinet.
- Tighten them evenly on both sides to keep the cabinet square.
You’ll notice the structure becomes noticeably more rigid after this step.
Step 3.5: Install the Upper Reinforcement Bar (Orientation Matters)
Attach the upper reinforcement bar (16) across the top of the cabinet.
⚠️ Important note: Make sure the concave hole is facing upward, as clearly indicated in the diagram. This orientation is necessary for proper alignment in later steps and ensures the top panels sit correctly.
Use F screws (M6 × 45 mm) to secure this piece firmly.
Step 3.6: Tighten and Final Check
Before moving on, go back and fully tighten all screws:
- Confirm all side frames are standing straight
- Ensure the cabinet is square from front to back
- Double-check that the concave hole orientation is correct
Once tightened, the drawer cabinet structure should feel solid and stable.\

Step 4: Attaching the Side Panels to the Drawer Cabinet
With the cabinet frame fully assembled, this step focuses on enclosing the structure by attaching the side panels. Once completed, the drawer cabinet will feel much more solid and visually complete.
Two layout options are shown in the instructions (Style 1 and Style 2). Both methods lead to the same result, so you can follow whichever orientation feels more natural in your workspace.
Step 4.1: Position the Side Panels
Take the side panels (Part 3) and place them against the open sides of the drawer cabinet frame.
Make sure the panels are aligned flush with the metal frame.
The pre-drilled holes on the panels should line up with the threaded holes in the frame.
Proper alignment at this stage will make fastening much easier and ensure a clean, finished look.
Step 4.2: Secure the Panels with Screws
Using C screws (M6 × 30 mm), attach each side panel to the metal frame.
Start by loosely threading the screws into place.
Once all screws are inserted, tighten them evenly to avoid pulling the panel out of alignment.
Each side panel is secured at multiple points, which adds rigidity to the entire cabinet and prevents flexing during everyday use.
Step 4.3: Repeat for the Opposite Side
Follow the same process to attach the second side panel on the opposite side of the cabinet.
Whether you follow Style 1 or Style 2 in the diagram, the goal is the same: both side panels should sit evenly and feel firmly connected to the frame.
Step 4.4: Final Check Before Moving On
Before proceeding to the next step, take a moment to check:
- All screws are fully tightened
- Both panels sit flush against the frame
- The cabinet remains square and stable
At this point, the drawer cabinet should feel noticeably sturdier and ready to receive the drawers in the upcoming step.
This step goes quickly once everything is aligned, but it’s worth slowing down slightly to make sure the panels are perfectly flush. I found that tightening the screws gradually—rather than all at once—helped keep everything straight and clean-looking.

Step 5: Connecting the Desk Frame to the Drawer Cabinet
At this stage, the desk begins to take its full L-shaped form. This step connects the main desk frame to the drawer cabinet, creating a unified and stable structure.
Two layout options are shown in the instructions (Style 1 and Style 2). Both achieve the same final setup, so you can follow the orientation that best matches your workspace.
Step 5.1: Position the Desk Frame
Place the main desk frame (Part 10) next to the assembled drawer cabinet.
Make sure the open side of the frame aligns with the cabinet so the horizontal support bars can connect cleanly between the two sections.
Taking a moment to align everything properly here will make fastening much easier.
Step 5.2: Install the Horizontal Support Bars
Attach the long horizontal bars (Parts 7 and 17) between the desk frame and the drawer cabinet.
Use E screws (M6 × 45 mm) to secure the bars at the top connection points.
Install G screws (Ø7 × 57 mm) at the lower connection points for added structural strength.
These bars are essential, as they transfer weight evenly across the desk and prevent wobbling once the desktop is installed.
Step 5.3: Check Stability and Alignment
Once all screws are in place:
Make sure the desk frame and cabinet sit square to each other.
Confirm that all connections feel firm.
Tighten all screws evenly.

Step 6: Installing the Desktop Panels
With the frame fully assembled, the final major step is attaching the desktop panels. This is where the desk truly comes together and starts to look like a finished piece of furniture.
Step 6.1: Position the Desktop Panels
Carefully place the desktop panel (Part 2) onto the frame.
- Align the pre-drilled holes on the underside of the desktop with the holes in the metal frame.
- Make sure the panel sits flush along all edges before securing it.
Because of its size, having a second person help with this step can make positioning easier.
Step 6.2: Secure the Desktop to the Frame
Using D screws (M6 × 35 mm), fasten the desktop panel to the frame from underneath.
- Start by threading all screws loosely.
- Once everything is aligned, tighten them evenly to avoid stressing the board.
This method helps ensure a clean, secure fit and prevents the desktop from shifting over time.
Step 6.3: Final Adjustments and Leveling
Once the desktop is fully secured:
- Adjust the leveling feet installed earlier to compensate for uneven flooring
- Check that the desktop sits flat and stable
- Give the entire desk a gentle shake to confirm everything is locked in place

Step 7: Securing the Main Desktop Panel
With the desk fully framed, this step focuses on installing and securing the main desktop panel. This is an important step, so it’s worth slowing down and doing it carefully.
Step 7.1: Position the Desktop Panel
Place the main desktop panel (Part 1) onto the assembled desk frame.
Align the pre-drilled holes on the underside of the panel with the holes in the metal frame.
Make sure the panel sits evenly and flush before inserting any screws.
The desktop should rest naturally on the frame without forcing it into position.
Step 7.2: Secure the Desktop by Hand (Important Note)
Using C screws (M6 × 30 mm) and D screws (M6 × 35 mm), fasten the desktop to the frame from underneath.
⚠️ Important:
Do not use an electric screwdriver for this step. Tightening the screws by hand helps prevent over-tightening and avoids the risk of screws punching through the tabletop.
Start all screws loosely first.
Once everything is aligned, tighten them gradually and evenly.
This approach keeps the desktop secure while protecting the surface finish.
Step 7.3: Final Desktop Check
After fastening the panel:
Run your hand along the edges to ensure everything is level.
Confirm the desktop feels solid with no movement.
Double-check that all screws are fully seated but not overtightened.

Step 8: Installing the Drawers and Finishing Touches
This final step brings everything together and turns the desk into a fully functional workstation.
Step 8.1: Insert the Drawers
Carefully slide each assembled drawer into the drawer cabinet.
Align the drawer rails with the cabinet guides.
Push each drawer in smoothly until it sits properly in place.
If a drawer feels tight, pull it back out and realign it rather than forcing it in.
Step 8.2: Apply the Anti-Slip Pads
Once the drawers are installed, apply the anti-slip pads (Part L) to the designated contact points.
- These pads help protect surfaces
- They reduce noise when opening and closing drawers
- They also improve overall stability during daily use
- It’s a small detail, but one that noticeably improves the user experience.
Step 8.3: Final Setup and Inspection
- Open and close each drawer to ensure smooth operation
- Check that the desk sits level on the floor
- Make any final adjustments using the leveling feet if needed

Final
Once assembled, the Tribesigns desk feels solid, balanced, and thoughtfully designed. The installation process follows a clear and logical flow, and while there are several steps involved, none feel overly complicated. Taking your time—especially during the desktop installation—clearly pays off in the final result.
Thank you for choosing Tribesigns. Each desk is designed with long-term use in mind, combining practical design with dependable materials to support everyday work. With proper assembly and care, this desk is built to deliver stable performance and lasting quality for years to come.
Read more: